Samsung BD-C6900 User Manual
Blu-ray disc player
Hide thumbs
Also See for BD-C6900:
- User manual (273 pages) ,
- Available apps (16 pages) ,
- Upgrade manual (1 page)
Table of Contents
Available languages
Available languages
Quick Links
See also:
User Manual
Table of Contents

Related Manuals for Samsung BD-C6900


Summary of Contents for Samsung BD-C6900
- Page 1 BD-C6900 Blu-ray Disc Player user manual imagine the possibilities Thank you for purchasing this Samsung product. To receive a more complete service, please register your product at www.samsung.com/register...
-
Page 2: Key Features
Key features Blu-ray Disc Features Subtitles Depending on what is contained on the Blu-ray Blu-ray Discs support the highest quality HD video Disc, you may be able to select different font available in the industry - Large capacity means styles, sizes and colours for the subtitles. Subtitles no compromise on video quality. -
Page 3: Safety Information
Safety Information Warning TO REDUCE THE RISK OF ELECTRIC SHOCK, DO NOT REMOVE THE COVER (OR BACK). NO USER-SERVICEABLE PARTS ARE INSIDE. REFER SERVICING TO QUALIFIED SERVICE PERSONNEL. CAUTION RISK OF ELECTRIC SHOCK DO NOT OPEN CAUTION: TO REDUCE THE RISK OF ELECTRIC This symbol indicates “dangerous voltage”... -
Page 4: Precautions
Safety Information Precautions Unplug this apparatus during lightning storms or when unused for long periods of time. Important Safety Instructions Refer all servicing to qualified service personnel. Servicing is required when the apparatus has been damaged in any way, Read these operating instructions carefully before such as power-supply cord or plug is using the unit. -
Page 5: Handling Cautions
Do not move the product while a disc is being product. played as the disc may be scratched or broken, • Samsung cannot assure that this product will or the product’s internal parts may be damaged. play every disc bearing the Blu-ray Disc, DVD •... -
Page 6: Table Of Contents
Contents Key FeATUreS Blu-ray Disc Features Blu-ray Disc Player Features SAFeTy INFOrMATION Warning Precautions Important Safety Instructions Disc Storage & Management Disc Handling GeTTING STArTeD Before Using the user manual Disc Types and Contents that can be played. Disc types that cannot be played Blu-ray Disc Compatibility Disc Types Supported File Formats... - Page 7 Connecting to the Network Cable Network Wireless Network SeTUP Before Starting (Initial Settings) Setting the Menu Display TV Aspect BD Wise (Samsung Products only) Resolution HDMI Format Movie Frame (24Fs) Progressive Mode Still Mode HDMI Deep Colour Audio Digital Output...
- Page 8 Change Password General Background Front Display Power On/Off Sound Light Effect Support Software Upgrade Contact Samsung BASIC FUNCTIONS Playing a Disc Playback Disc Structure Using the Disc menu/Title menu/Popup menu Using the Disc Menu Using the Title Menu Playing the Title List...
- Page 9 Playing back a Picture Playing a JPEG Disc Using the TOOLS button Playing back a USB Storage Device NeTWOrK ServICeS Using Internet@TV Getting Started with Internet@TV Settings Samsung Apps BD-LIVE™ Software Upgrade Notification Using the AllShare Function APPeNDIx Troubleshooting Index Specifications...
-
Page 10: Getting Started
Getting Started Before Using the user manual Disc Types and Contents that can be played. Term Logo Icon Definition BD-ROM This involves a function available on a BD-ROM. BD-RE/-R � This involves a function available on a BD-RE/-R disc recorded in the BD-RE format. DVD-VIDEO This involves a function available on a DVD-VIDEO. -
Page 11: Blu-Ray Disc Compatibility
This is not a malfunction of the Please note that this is not a defect in the product. product. ▪ Samsung cannot assure that this product will play DVD-RW every disc bearing the Blu-ray Disc, DVD or CD logo because disc formats evolve, and problems and... -
Page 12: Supported File Formats
Getting Started DVD+R CD-RW/-R • This product can play back a DVD+R disc • Use a 700MB (80 minute) CD-RW/-R disc. recorded and finalized with a DVD Video If possible, do not use a 800MB (90 minute) or recorder. Ability to play back may depend on above disc, as the disc may not play back. -
Page 13: Region Code
© 2010 Samsung Electronics Co.,Ltd. All rights reserved; No part or whole of this user's manual may be reproduced or copied without the prior written permission of Samsung Electronics Co.,Ltd. English... -
Page 14: Logos Of Discs That Can Be Played
Getting Started Logos of Discs that can be played Blu-ray Disc 3D Blu-ray Disc DTS-HD Master Audio DivX PAL broadcast System in BD-LIVE Dolby TrueHD Java U.K., France, Germany, etc. Accessories Check for the supplied accessories below. POWER POWER BONUSVIEW SOURCE SUBTITLE AUDIO... -
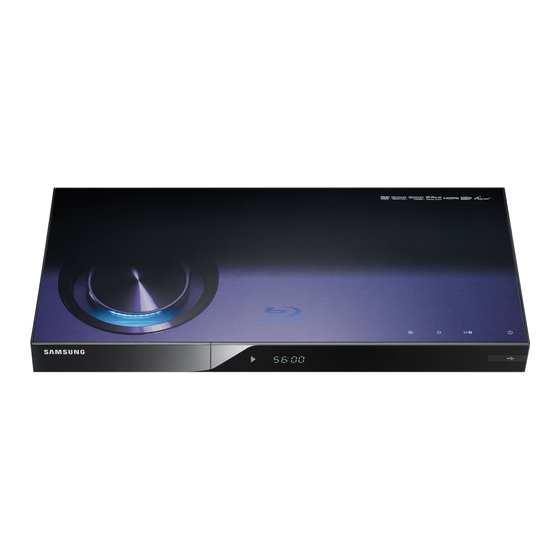
Page 15: Front Panel
Front Panel d e f DISC TRAY Opens to accept a disc. DISPLAY Displays the playing status, time, etc. REMOTE CONTROL SENSOR Detects signals from the remote control. OPEN/CLOSE BUTTON Opens and closes the disc tray. STOP BUTTON Stops disc playback. PLAY/PAUSE BUTTON Plays a disc or pauses playback. -
Page 16: Front Panel Display
Getting Started Front Panel Display IN DISC INDICATOR Lights when a disc is inserted or played back. CURRENT TIME AND Displays the play time and the current status. STATUS INDICATOR 3D DISC INDICATOR Lights when 3D disc is inserted or played back. WIFI INDICATOR Lights when the wireless network is connected. -
Page 17: Rear Panel
rear Panel DIGITAL AUDIO OUT Connects to a Receiver. (OPTICAL) Can be used for network based services (See pages 53~58), BD-LIVE and software upgrades using a network connection. Using an HDMI cable, connect this HDMI output terminal to the HDMI input terminal HDMI OUT on your TV for the best quality picture or to your Receiver for the best quality sound. -
Page 18: Remote Control
Getting Started remote Control Tour of the Remote Control POWER POWER Turn the product on and off. Turn the TV on and off. (To operate your TV, please refer to page 19) To open and close the disc tray. BONUSVIEW SOURCE After setup, allows you to set the input Press this to use Bonusview function. -
Page 19: Setting The Remote Control
Code Brand Code this remote control. NOBLEX TV POWER+66 TV POWER+01, +02, Button Function SAMSUNG +03, +04, +05, NOKIA TV POWER+74 +06, +07, +08, +09 TV POWER Used to switch the television on and off. TV POWER+72, +73, NORDMENDE AIWA... -
Page 20: Connections
Connections Connecting to a Tv Case 1 : Connecting to a TV with an HDMI Cable - Best Quality (Recommended) Using an HDMI cable, connect the HDMI OUT terminal on the rear of the product to the HDMI IN terminal of your TV. Turn on the product and TV. -
Page 21: Case 2 : Connecting To A Tv With A Dvi Cable - Best Quality (Recommended)
Case 2 : Connecting to a TV with a DVI Cable - Best Quality (Recommended) Using an HDMI-DVI cable, connect the HDMI OUT terminal on the rear of the product to the DVI IN terminal of your TV. Using the audio cables, connect the AUDIO OUT (red and white) terminals on the rear of the product to the AUDIO IN (red and white) terminals of your TV. -
Page 22: Case 3 : Connecting To A Tv (Component) - Better Quality
Connections Case 3 : Connecting to a TV (Component) - Better Quality Connecting to your TV using Component video cables. You will enjoy high quality images with accurate colour reproduction. Component video separates the picture element into black and white (Y), blue (P ) and red (P ) signals to present clear and clean images. -
Page 23: Case 4 : Connecting To A Tv (Video) - Good Quality
Case 4 : Connecting to a TV (Video) - Good Quality Using video/audio cables, connect the VIDEO OUT (yellow) / AUDIO OUT (red and white) terminals on the rear of the product to the VIDEO IN (yellow) / AUDIO IN (red and white) terminals of your TV. -
Page 24: Connections
Connections Connecting to an Audio System • Please turn the volume down when you turn on the Amplifier. A sudden loud sound may cause damage to the speakers and your ears. • Set the audio output format according to the capabilities of your amplifier. (See pages 34~36) •... -
Page 25: Case 2 : Connecting To An Audio System (7.1 Channel Amplifier) - Better Quality
Case 2 : Connecting to an Audio System (7.1 Channel Amplifier) - Better Quality Using the 7.1CH audio cables, connect the 7.1CH ANALOG AUDIO OUT terminals on the rear of the product to the 7.1CH ANALOG AUDIO IN terminals of your amplifier. Using the video signal cable(s), connect the HDMI, COMPONENT or VIDEO OUT terminals on the rear of the product to the HDMI, COMPONENT or VIDEO IN terminal of your TV. -
Page 26: Case 3 : Connecting To An Audio System
Connections Case 3 : Connecting to an Audio Case 4 : Connecting to an Audio System (Dolby Digital, DTS System (2 Channel Amplifier) Amplifier) - Better Quality - Good Quality Using an optical cable, connect the DIGITAL Using audio cables, connect the AUDIO OUT AUDIO OUT (OPTICAL) terminal on the rear (red and white) terminals on the rear of the of the product to the DIGITAL AUDIO IN... -
Page 27: Connecting To The Network
(See pages 57~58) NOTE ▪ Internet access to Samsung’s software update server may not be allowed, depending on the router you use or the ISP’s policy. For more information, contact your ISP (Internet Service Provider). ▪ For DSL users, please use a router to make a network connection. -
Page 28: Wireless Network
AllShare function (See pages 57~58) NOTE Use only the Samsung wireless LAN adapter with this product. (Model name: WIS09ABGN). ▪ Do not use this adapter with any other third-party products. Please contact the retailer of this product for purchasing the wireless LAN adapter. -
Page 29: Setup
Setup Before Starting (Initial Settings) Press the ◄► buttons to select the desired Network Settings : Wired, Wireless or PBC (WPS), and then press the ENTER button. Turn on your TV after connecting the product. If you do not know your Network Settings, (When the product is connected to TV for the press the BLUE (D) button on your remote first time, the product will turn on automatically... -
Page 30: Setting The Menu
EXIT Button : Press this to exit the menu. NOTE ▪ When the product is connected to the network, select Internet@TV from the Home menu. Download desired content from Samsung Apps. (See page 56) ▪ The access steps may differ depending on the selected menu. -
Page 31: Display
TV Screen Size Display Lets you enter the actual screen size of your TV so You can configure various display options such as that the product can adjust the image according to the the TV Aspect, Resolution, etc. screen size and display an optimal 3D image. (The maximum allowed screen size is 116 inches for this product.) Select whether to play a Blu-ray Disc with 3D... -
Page 32: Tv Aspect
When you connect Samsung products with BD 16:9 Normal • Wise to a Samsung TV via HDMI, the optimum resolution is set automatically. Certain movies (4:3 source) are On : The original resolution of the BD/DVD disc •... -
Page 33: Resolution According To The Output Mode
Resolution according to the output mode Blu-ray Disc playback • HDMI connected HDMI not connected Output Setup HDMI Mode Component/VIDEO Mode Component Mode VIDEO Mode Auto Optimal Resolution 576i/480i 1080p, Movie Frame(24Fs) off 1080p@60F 576i/480i 1080p/1080i, 1080p@24F 576i/480i Movie Frame(24Fs) on 1080i, Movie Frame(24Fs) off 1080i 576i/480i... -
Page 34: Hdmi Format
Setup HDMI Format HDMI Deep Colour You can optimize the colour setting from the HDMI Set to output the picture from the HDMI OUT jack output by selecting a connected device Type. with Deep Colour or without. Deep Colour allows TV : Select if connected to a TV via HDMI. -
Page 35: Pcm Downsampling
Digital Output Selection Bitstream Bitstream Setup (Re-encode) (Audiophile) Connection HDMI Receiver Optical HDMI Receiver or Optical HDMI Receiver Optical Up to 7.1ch PCM 2ch DTS re-encoded PCM 2ch Dolby Digital Up to 5.1ch PCM 2ch DTS re-encoded Dolby Digital Dolby Digital Dolby Digital Dolby Digital Up to 7.1ch... -
Page 36: Dynamic Range Control
Setup HDMI Cinema : Outputs 2-channel movie sound over • multi-channels. • If your TV is not compatible with compressed Music : Outputs 2-channel music over multi- • multi-channel formats (Dolby Digital, DTS), the channels. product may output PCM 2ch downmixed NOTE audio even though you set Bitstream (either Re- encode or Audiophile) on your setup menu. -
Page 37: System
USB devices that support the not support CEC. USB 2.0 protocol with 4 MB/sec or faster read/write ▪ If your Samsung TV has an n logo, then it speed. supports the Anynet+ function. ▪ A USB HDD device cannot be used for BD Data ▪... -
Page 38: Clock
Setup Clock DivX(R) Deactivation Set time-related functions. Select this to get a new registration code. Settings Settings Display On-Screen Menu Clock Display Initial Setting Audio Disc Menu Clock Mode : Auto Audio Disc Menu System Audio Clock Set System Audio Network Subtitle Time Zone... -
Page 39: Wired Network
Wired Network Setting Up a Wired Connection - Manual If the Auto Setting does not work, you’ll need to In the Network Settings menu, press the ▲▼ set the Network Setting values manually. buttons to select Network Settings, and then To get the Network setting values from most press the ENTER button. - Page 40 Setup Press the RETURN button on your remote. Setting Up the Wireless Network Connection - Auto Network Search Run a Network Test to ensure the product has connected to your network (See page 42). Most wireless networks have an optional security system that requires devices that access the Wireless Network network to transmit an encrypted security code...
- Page 41 In the list of networks, press the ▲▼ buttons Wait until the connection confirmation to select a network, and then press the message is displayed, and then press the ENTER button. ENTER button. The Network Settings screen reappears. If the PIN/Security pop-up appears, go to Step 7.
-
Page 42: Network Status
Setup Enter the IP Address, Subnet Mask, and NOTE Gateway values. What is a valid certificate? ▪ Press the ▼ to go to DNS. When the product uses BD-LIVE to send the disc data and a request to the server to certify the disc, the Press the ▼... -
Page 43: Change Password
Front Display Settings Display Parental Rating Change the brightness of the front panel. Off Audio Change Password Auto : Dim during playback. 8 (Adult) • System Dim : Dim the display window. • Network Language Bright : Brighten the display window. •... -
Page 44: Support
Never turn the product off or on manually during the update process. ▪ Samsung Electronics shall take no legal responsibility for product malfunction caused an unstable internet connection or consumer negligence during software upgrade. -
Page 45: Basic Functions
Basic Functions Playing a Disc Using the Disc menu/Title menu/ Popup menu Playback Using the Disc Menu Press the OPEN/CLOSE ( ) button to open the disc tray. Place a disc gently into the tray with the disc’s During playback, press the DISC MENU label facing up. -
Page 46: Using The Popup Menu
Basic Functions Using the Popup Menu Skipping Chapters h�Z�� During playback, press the SKIP ( • During playback, press the POPUP button. MENU button on the remote control. If you press the SKIP ( ) button, the disc Press the ▲▼◄► buttons or ENTER moves to the next chapter. -
Page 47: Repeat Playback
repeat Playback Press the ENTER button at the point where you want repeat play to stop (B). To return to normal play, press the REPEAT Repeat the Title or Chapter button again. Press the ENTER button. h�Z� NOTE Repeat the disc title or chapter. ▪... -
Page 48: Selecting The Audio Language
Basic Functions Selecting the Audio Language NOTE ▪ Depending on the Blu-ray Disc / DVD, you may be able to change the desired subtitle in the Disc Menu. h�Z� Press the DISC MENU button. ▪ You can also operate this function by This function depends on which subtitles are pressing the AUDIO button on the encoded on the disc and may not be available on all... -
Page 49: Setting Bonusview
Listening to Music Dynamic : Choose this setting to increase • Sharpness. o� Normal : Choose this setting for most • viewing applications. Buttons on the Remote Control Movie : This is the best setting for watching • used for Music Playback POWER POWER POWER... -
Page 50: Playing An Audio Cd (Cd-Da)/Mp3
Basic Functions SKIP button : During playback, moves to the Shows the current play time/total play time. previous page in the Music List or moves to the Displays the current playback status previous track in the Playlist. If you press this button after three seconds of Displays the repeated playback status. -
Page 51: Playing Back A Picture
Playing back a Picture Press the ▲▼◄► buttons to move desired track, then press the YELLOW (C) button to check desired tracks. Repeat this procedure to select additional Playing a JPEG Disc tracks. Music TRACK 003 3 files selected 1/2 Page Insert a JPEG disc into the disc tray. -
Page 52: Playing Back A Usb Storage Device
Basic Functions Zoom : Select if you want to enlarge the current • Press the ▲▼ buttons to select USB, then press the ENTER button. picture. (Enlarged up to 4 times) Rotate : Select if you want to rotate the picture. •... -
Page 53: Network Services
Change Device View Devices Enter " Samsung Apps : You can download various for a Press the ◄► buttons to select Internet@TV fee or free-of-charge application services. and press the ENTER button. In the start screen of the Internet@TV service, you will see the service agreement screen. - Page 54 Pressing the SUBTITLE button on the remote NOTE while you are using the Screen Keypad lets you ▪ Samsung Electronics shall take no legal responsibility change the text fields to lower case, upper case, for any interruption of the Internet@TV service numbers and icons.
-
Page 55: Settings
Account Login System Setup For a more enjoyable application experience, reset register and log in to your account. To do this, you must create an account first. Resets Internet@TV settings to factory default (For instructions on creating an account, refer to settings. -
Page 56: Samsung Apps
Network Services Service Manager Using the colour buttons with the Samsung Apps Delete and lock applications installed to Internet@ RED (A) (Login) : To log in to the internet • service. GREEN (B) (Thumbnail View) : To change the •... -
Page 57: Bd-Live
PC via the network (See pages 27~28) Check the size of the remaining memory. and install the SAMSUNG PC Share Manager on The memory device must have at least 1GB the PC. To install and use Share Manager, follow of free space to accommodate the BD-LIVE these steps. - Page 58 AllShare Program at a Glance To select a device, use the RED (A) or BLUE (D) button to select a file to play. (For playing back Video, Music or Photos files, see pages 45~52.) SAMSUNG PC Share Manager File Share Server Help...
-
Page 59: Appendix
Appendix Troubleshooting Before requesting service, please check the following. PROBLEM SOLUTION No operation can be performed with the • Check the batteries in the remote control. They may need replacing. remote control. • Operate the remote control at a distance of no more than 6.1m. •... - Page 60 Go to the contents and find the section of the user manual that contains the explanations regarding the current problem, and follow the procedure once again. • If the problem still cannot be solved, please contact your nearest Samsung authorized service centre. The picture is noisy or distorted •...
- Page 61 PROBLEM SOLUTION BD-LIVE I cannot connect to the BD-LIVE server. • Check whether the network connection is successful or not by using Network Test menu. (See page 42) • Check whether a USB memory device is connected to product or not. •...
-
Page 62: Index
Supported File Format Disc Structure Software Upgrade 44, 57 Search and Skip Slow and Step HDMI 20, 36 Subtitle Language HDMI Supported Amplifier Slide Show HDMI Deep Color SAMSUNG PC Share Manager 57~58 Internet@TV 37, 53 Initial Settings 29, 37 English... -
Page 63: Specifications
Specifications Weight 1.8 Kg Dimensions 430 (W) × 205 (D) × 43 (H) mm General Operating Temperature Range +5°C to +35°C Operating Humidity Range 10 % to 75 % BD (Blu-ray Disc) Reading Speed : 4.917m/sec Reading Speed : 3.49 ~ 4.06 m/sec. DVD (Digital Versatile Disc) Approx. -
Page 64: Compliance And Compatibility Notice
• Samsung cannot assure that this product will play every disc bearing the BD-ROM, BD-RE/-R, DVD-VIDEO, DVD-RW/-R, DVD+RW/+ R and CD-RW/-R logos, and this product may not respond to all operating commands or operate all features of every disc. -
Page 65: Network Service Disclaimer
CONTENT OR SERVICE BY YOU OR ANY THIRD PARTY, EVEN IF ADVISED OF THE POSSIBILITY OF SUCH DAMAGES. Third party services may be terminated or interrupted at any time, and Samsung makes no representation or warranty that any content or service will remain available for any period of time. Content and services are transmitted by third parties by means of networks and transmission facilities over which Samsung has no control. -
Page 66: License
Appendix License • Manufactured under license from Dolby Laboratories. “Dolby” and the double-D symbol are trademarks of Dolby Laboratories. • Manufactured under license under U.S. Patent #’s: 5,451,942; 5,956,674; 5,974,380; 5,978,762; 6,226,616; 6,487,535; 7,212,872; 7,333,929; 7,392,195; 7,272,567 & other U.S. and worldwide patents issued & pending. DTS and the Symbol are registered trademarks, &... - Page 67 Contact SAMSUNG WORLD WIDE If you have any questions or comments relating to Samsung products, please contact the SAMSUNG customer care centre. Area Contact Centre Web Site Area Contact Centre Web Site ` North America www.samsung.com/ch 0848 - SAMSUNG (7267864, Switzerland www.samsung.com/...
- Page 68 AK68-01945U...
- Page 69 Đầu Đĩa Blu-ray tài liệu hướng dẫn người dùng hãy tưởng tượng mọi điều có thể Cám ơn bạn đã mua sản phẩm Samsung này. Để nhận được dịch vụ đầy đủ hơn, hãy đăng ký sản phẩm của bạn tại www.samsung.com/register...
- Page 70 Các tính năng chính Các tính năng của Đĩa Blu-ray Phụ đề Tuỳ thuộc vào nội dung có trên Đĩa Blu-ray, bạn Đĩa Blu-ray hỗ trợ video HD (độ phân giải cao) có thể chọn các kiểu phông chữ, kích thước và có...
- Page 71 Thông tin về An toàn Cảnh báo ĐỂ GIẢM THIỂU NGUY CƠ BỊ ĐIỆN GIẬT, KHÔNG ĐƯỢC THÁO VỎ (HOẶC PHẦN ĐẰNG SAU). KHÔNG CÓ CÁC BỘ PHẬN NGƯỜI DÙNG CÓ THỂ SỬA CHỮA ĐƯỢC BÊN TRONG. HÃY MANG TỚI CÁC NHÂN VIÊN DỊCH VỤ...
- Page 72 Thông tin về An toàn Lưu ý Rút phích cắm đầu máy này khi có hiện tượng mưa bão sấm chớp hoặc khi không sử dụng trong thời gian dài. Các hướng dẫn An toàn Quan trọng Hãy mang tới nhân viên dịch vụ có trình độ chuyên môn khi bạn cần bảo dưỡng thiết bị.
- Page 73 • Samsung không đảm bảo rằng sản phẩm này • Không đặt bình hoa đầy nước hoặc bất kỳ vật sẽ chạy mọi đĩa mang logo Blu-ray Disc, DVD kim loại nhỏ...
- Page 74 Nội dung CÁC TÍNH NĂNG CHÍNH Các tính năng của Đĩa Blu-ray Các Tính năng của Đầu Đĩa Blu-ray THÔNG TIN VỀ AN TOÀN Cảnh báo Lưu ý Các hướng dẫn An toàn Quan trọng Lưu trữ & Quản lý Đĩa Thao tác với Đĩa BẮT ĐẦU Trước khi Sử...
- Page 75 THIẾT LẬP Trước khi Bắt đầu (Cài đặt Ban đầu) Thiết lập Menu Hiển thị Khung hình TV BD Wise (Chỉ Sản phẩm của Samsung) Độ phân giải Định dạng HDMI Khung Hình (24 Hình/giây) Chế độ Liên tục Chế độ Tĩnh Độ...
- Page 76 Nền Màn hình Trước Âm thanh Bật/Tắt Nguồn Hiệu ứng Ánh sáng Hỗ trợ Nâng cấp Phần mềm Liên hệ với Samsung CHỨC NĂNG CƠ BẢN Chạy Đĩa Mở Cấu tạo Đĩa Sử dụng menu Đĩa/menu Tiêu đề/menu Bật lên Sử...
- Page 77 Sử dụng nút TOOLS Mở Thiết bị Lưu trữ USB DỊCH VỤ MẠNG Sử dụng Internet@TV Bắt đầu với Internet@TV Cài đặt Samsung Apps BD-LIVE™ Thông báo Nâng cấp Phần mềm Sử dụng Chức năng AllShare PHỤ LỤC Khắc phục sự cố...
- Page 78 Bắt đầu Trước khi Sử dụng tài liệu hướng dẫn người dùng Loại và Nội dung Đĩa có thể mở được. Thuật ngữ Logo Biểu tượng Định nghĩa BD-ROM Biểu tượng này bao hàm một chức năng có trong BD-ROM. BD-RE/-R Chỉ...
- Page 79 Vui lòng liên hệ với trung tâm chăm sóc khách hàng mở có thể phụ thuộc vào điều kiện ghi. của SAMSUNG nếu bạn có thắc mắc hoặc gặp phải DVD+RW khó khăn trong quá trình chạy các đĩa Blu-ray, DVD hoặc CD bằng sản phẩm này.
- Page 80 Bắt đầu DVD+R CD-RW/-R • Sản phẩm này có thể mở đĩa DVD+R được ghi • Sử dụng đĩa CD-RW/-R 700MB (80 phút). và hoàn thiện bằng thiết bị ghi Video DVD. Khả Nếu có thể, không sử dụng đĩa 800MB (90 năng mở...
- Page 81 được, tuỳ thuộc vào độ phân giải của hướng dẫn người dùng này mà không được sự video và điều kiện tỷ lệ khung hình. cho phép bằng văn bản từ trước của Samsung Electronics Co., Ltd. Tiếng Việt...
- Page 82 Bắt đầu Biểu tượng của các Đĩa có thể chạy Đĩ a Blu-ray Đĩ a Blu-ray 3D DTS-HD Master Audio DivX Hệ thố ng phá t theo chuẩ n PAL BD-LIVE Dolby TrueHD Java tạ i Anh, Phá p, Đứ c, v.v... Phụ...
- Page 83 Bảng phía Trước KHAY ĐĨ A Mở để nhậ n đĩ a. MÀ N HÌ NH Hiể n thị trạ ng thá i chạ y, thờ i gian,v.v... BỘ CẢ M BIẾ N ĐIỀ U Phá t hiệ n tí n hiệ u từ điề u khiể n từ xa. KHIỂ...
- Page 84 Bắt đầu Màn hình hiển thị của Bảng phía Trước ĐÈ N BÁ O ĐĨ A Đè n sá ng khi đĩ a đã đượ c đưa và o hoặ c đang mở . ĐÈ N BÁ O THỜ I GIAN VÀ Hiể...
- Page 85 Bảng phía Sau DIGITAL AUDIO OUT Kế t nố i vớ i mộ t Bộ thu. (OPTICAL) Có thể sử dụ ng cho cá c dị ch vụ dự a trên mạ ng (Xem trang 53~58), BD-LIVE và cá c quá trì nh nâng cấ p phầ n mề m sử dụ ng kế t nố i mạ ng. Sử...
- Page 86 Bắt đầu Điều khiển Từ xa Tìm hiểu Điều khiển Từ xa POWER POWER Bật và tắt sản phẩm. Bật và tắt TV. (Để biết cách sử dụng TV, hãy tham khảo Để mở và đóng khay đĩa. trang 19) BONUSVIEW SOURCE Sau khi cài đặt, cho phép bạn thiết đặt...
- Page 87 Nhãn hiệu Mã TV của bạn bằng điều khiển từ xa. NOBLEX TV POWER+66 Nút Chức năng TV POWER+01, +02, SAMSUNG +03, +04, +05, NOKIA TV POWER+74 +06, +07, +08, +09 TV POWER Dùng để bật và tắt TV. TV POWER+72,...
- Page 88 Kết nối Kết nối với TV Trường hợp 1 : Kết nối với TV bằng Cáp HDMI - Chất lượng Tốt nhất (Khuyên dùng) HDMI OUT ở phía sau của sản phẩm với cổng HDMI IN của TV. Sử dụng cáp HDMI, kết nối cổng Bật sản phẩm và...
- Page 89 Trường hợp 2 : Kết nối với TV bằng Cáp DVI - Chất lượng Tốt nhất (Khuyên dùng) HDMI OUT ở phía sau của sản phẩm với cổng DVI IN của Sử dụng cáp HDMI-DVI, kết nối cổng AUDIO OUT (đỏ và trắng) ở phía sau của sản phẩm với Sử...
- Page 90 Kết nối Trường hợp 3 : Kết nối tới TV (Component) - Chất lượng Tốt hơn Kết nối với TV của bạn sử dụng cáp video Thành phần. Bạn sẽ được thưởng thức những hình ảnh chất lượng cao với màu sắc được tái tạo trung thực nhất. Video component tách yếu tố...
- Page 91 Trường hợp 4 : Kết nối với TV (Video) - Chất lượng Tốt VIDEO OUT (vàng) / AUDIO OUT (đỏ và trắng) ở Sử dụng cáp video/âm thanh, kết nối các cổng phía sau của sản phẩm với các cổng VIDEO IN (vàng) / AUDIO IN (đỏ và trắng) của TV. Bật sản phẩm và...
- Page 92 Kết nối Kết nối với Hệ thống Âm thanh • Hãy giảm âm lượng khi bạn bật Bộ khuếch đại. Âm thanh lớn bất ngờ có thể làm hỏng loa và nhói tai bạn. • Hãy thiết lập âm thanh trong màn hình menu theo Bộ khuếch đại. (Xem trang 34~36) •...
- Page 93 Trường hợp 2 : Kết nối với Hệ thống Âm thanh (Bộ Khuếch đại 7,1 Kênh) - Chất lượng Tốt hơn 7.1CH ANALOG AUDIO OUT ở phía sau của sản Sử dụng cáp âm thanh 7.1CH, kết nối cổng phẩm với cổng 7.1CH ANALOG AUDIO IN của Bộ khuếch đại. HDMI, COMPONENT hoặc VIDEO OUT ở...
- Page 94 Kết nối Trường hợp 3 : Kết nối với Hệ thống Trường hợp 4 : Kết nối với Hệ Âm thanh (Bộ khuếch đại Dolby thống Âm thanh (Bộ khuếch đại 2 Digital, DTS) - Chất lượng Tốt hơn Kênh) - Chất lượng Tốt DIGITAL Sử...
- Page 95 ▪ Truy cập internet vào máy chủ cập nhật phần mềm của Samsung có thể không được cho phép, tuỳ thuộc vào bộ định tuyến bạn sử dụng hoặc chính sách của ISP. Để biết thêm thông tin, hãy liên hệ với Nhà Cung cấp Dịch vụ Internet (ISP) của bạn.
- Page 96 (Xem trang 57~58) CHÚ Ý ✎ Chỉ sử dụng bộ điều hợp mạng LAN không dây tuỳ chọn của Samsung với sản phẩm này. ▪ (Tên mẫu: WIS09ABGN). Không sử dụng bộ điều hợp này với bất kỳ sản phẩm bên thứ ba nào khác.
- Page 97 Thiết lập Trước khi Bắt đầu (Cài đặt Ban đầu) Bấm các nút ◄► để chọn Network Settings mong muốn: Wired, Wireless hoặc PBC (WPS) rồi bấm nút ENTER. Bật TV sau khi kết nối sản phẩm. Nếu bạn không biết về Cài đặt Mạng của (Khi sản phẩm được kết nối với TV lần đầu, mình, hãy bấm nút XANH LAM (D) trên bộ...
- Page 98 ✎ Khi sản phẩm được kết nối với mạng, chọn ▪ Internet@TV từ menu chính. Tải xuống nội dung mong muốn từ Samsung Apps. (Xem trang 56) Các bước truy cập có thể khác nhau tuỳ thuộc vào ▪ menu được chọn.
- Page 99 Kích thước Màn hình Ti vi Hiển thị Cho phép bạn nhập kích thước màn hình thực của Ti Bạn có thể định cấu hình nhiều tuỳ chọn hiển thị vi của mình để sản phẩm có thể điều chỉnh hình ảnh khác nhau như...
- Page 100 Khi bạn kết nối các sản phẩm có BD Wise của Bộ phim nà o đó (nguồ n 4:3) sẽ Samsung với nhau thông qua HDMI, độ phân giải đượ c hiể n thị dướ i dạ ng Hộ p trụ...
- Page 101 Độ phân giải theo chế độ xuất ra Mở Đĩa Blu-ray • HDMI / được kết nối HDMI / không được kết nối Đầu ra Thiết lập Chế độ HDMI Chế độ Component/VIDEO Chế độ Component Chế độ VIDEO Tự động Độ...
- Page 102 Thiết lập Định dạng HDMI Độ sâu Màu HDMI Bạn có thể tối ưu hoá cài đặt màu sắc từ đầu ra Thiết lập để xuất ra hình ảnh có hoặc không có HDMI bằng cách chọn Loại thiết bị được kết nối. Độ...
- Page 103 Lựa chọn Đầu ra Kỹ thuật số Thiết lập Bitstream (Re-encode) Bitstream (Audiophile) Kết nối Bộ thu HDMI Quang Bộ thu HDMI hoặc Quang Bộ thu HDMI Quang Tối đa PCM PCM 2ch DTS được mã hoá lại PCM 2ch 7.1ch Tối đa PCM Dolby Digital...
- Page 104 Thiết lập HDMI Cinema • : Xuất ra âm thanh phim 2 kênh thành đa kênh. • Nếu TV của bạn không tương thích với các Music • : Xuất ra nhạc 2 kênh thành đa kênh. định dạng đa kênh nén (Dolby Digital, DTS), sản CHÚ...
- Page 105 Bạn có thể điều khiển sản phẩm này bằng điều CHÚ Ý ✎ khiển từ xa của TV Samsung và bắt đầu mở đĩa bằng cách bấm nút PHÁT ( Trong chế độ bộ nhớ ngoài, việc mở đĩa sẽ bị dừng ▪...
- Page 106 Thiết lập Đồng hồ Huỷ kích hoạt DivX(R) Thiết lập các chức năng liên quan đến thời gian. Chọn tuỳ chọn này để lấy mã đăng ký mới. Settings Settings Display Clock Display Initial Setting Audio Audio Disc Menu Clock Mode : Auto System System...
- Page 107 Mạng Có dây Thiết lập Kết nối Có dây - Thủ công Nếu Cài đặt Tự động không hoạt động, bạn sẽ Trong menu Network Settings, bấm các nút cần phải thiết lập các giá trị Cài đặt Mạng theo ▲▼...
- Page 108 Thiết lập RETURN trên điều khiển từ xa. Thiết lập Kết nối Mạng Không dây Bấm nút - Tìm kiếm Mạng Tự động Chạy Kiểm tra Mạng để đảm bảo sản phẩm đã kết nối với mạng của bạn (Xem trang 42). Hầu hết các mạng không dây đều có...
- Page 109 Trong danh sách mạng, bấm các nút ▲▼ để Đợi cho đến khi thông báo xác nhận kết nối chọn mạng rồi bấm nút ENTER. được hiển thị rồi bấm nút ENTER. Màn hình Cài đặt Mạng sẽ xuất hiện lại. Nếu xuất hiện cửa sổ...
- Page 110 Thiết lập IP Address, Subnet Mask CHÚ Ý ✎ Nhập các giá trị và Gateway. Chứng chỉ hợp lệ là gì? ▪ Khi sản phẩm sử dụng BD-LIVE để gửi dữ liệu đĩa DNS. Bấm ▼ để chuyển tới và yêu cầu tới máy chủ để chứng nhận đĩa, máy chủ Bấm nút ▼...
- Page 111 Màn hình Trước Settings Thay đổi độ sáng của bảng phía trước. Display Parental Rating Audio Change Password Auto 8 (Adult) • : Mờ trong khi mở. System • : Làm mờ cửa sổ hiển thị. Network Language Bright • : Làm sáng cửa sổ...
- Page 112 động kết nối với • : Truy cập www.samsung.com/ trang web của Samsung mỗi lần được bật và sẽ bluraysupport, tải xuống và ghi phần mềm mới tải xuống các tập tin cập nhật nếu có bất kỳ bản nhất (tập tin RUF) vào đĩa.
- Page 113 Chức năng Cơ bản Chạy Đĩa Sử dụng menu Đĩa/menu Tiêu đề/ menu Bật lên Mở Sử dụng Menu Đĩa MỞ/ĐÓNG ( Bấm nút ) để mở khay đĩa. Hãy đặt đĩa vào khay nhẹ nhàng với nhãn đĩa hướng lên trên. DISC MENU Trong khi mở, bấm nút MỞ/ĐÓNG (...
- Page 114 Chức năng Cơ bản Sử dụng Menu Bật lên Bỏ qua các Chương hzZyx BỎ QUA ( • Trong lúc mở, bấm nút MENU BẬT Trong khi mở, bấm nút Nếu bạn bấm nút BỎ QUA ( LÊN trên điều khiển từ xa. ), đĩa sẽ...
- Page 115 Phát lại ENTER tại điểm bạn muốn dừng Bấm nút phát lại (B). Phát lại Tiêu đề hoặc Chương Để quay lại chế độ phát bình thường, bấm nút REPEAT lần nữa. ENTER. Bấm nút hzZy CHÚ Ý ✎ Phát lại tiêu đề hoặc chương của đĩa. Nếu bạn thiết lập điểm (B) trước khi hết 5 giây, ▪...
- Page 116 Chức năng Cơ bản Chọn Ngôn ngữ Âm thanh CHÚ Ý ✎ Tuỳ thuộc vào Đĩa Blu-ray / DVD, bạn có thể thay đổi ▪ hzZx phụ đề mong muốn trong Disc Menu. Bấm nút DISC MENU. Bạn cũng có thể sử dụng chức năng Chức năng này phụ...
- Page 117 Nghe Nhạc Dynamic • : Chọn cài đặt này để tăng Độ sắc nét. Normal • : Chọn cài đặt này cho hầu hết các ứng dụng xem. Các nút trên Điều khiển Từ xa Movie • : Đây là cài đặt tốt nhất để xem phim.
- Page 118 Chức năng Cơ bản Nú t BỎ QUA : Trong khi mở , chuyể n đế n trang Hiể n thị thờ i gian phá t hiệ n tạ i/tổ ng thờ i gian phá t. trướ c trong Danh sá ch Nhạ c hoặ c chuyể n đế n bà i Hiể...
- Page 119 Mở Hình ảnh Bấm các nút ▲▼◄► để di chuyển bài hát mong muốn rồi bấm nút VÀNG (C) để đánh dấu chọn các bài hát mong muốn. Lặp lại quy trình này để chọn thêm các bài hát khác. Phát Đĩa JPEG Music TRACK 003...
- Page 120 Chức năng Cơ bản Zoom • : Chọn tuỳ chọn này nếu bạn muốn Bấm các nút ▲▼ để chọn USB rồi bấm nút ENTER. phóng to ảnh hiện tại. (Phóng to tối đa 4 lần) Rotate • : Chọn tuỳ chọn này nếu bạn muốn Bấm các nút ◄►...
- Page 121 View Devices " Enter tà i khoả n, v.v... Samsung Apps : Bạ n có thể tả i xuố ng nhiề u dị ch vụ Bấm các nút ◄► để chọn Internet@TV và Internet@TV và Bấm các nút ◄► để chọn tí...
- Page 122 CHÚ Ý ✎ chữ thường, chữ hoa, số và biểu tượng. Samsung Electronics sẽ không chịu trách nhiệm ▪ pháp lý về bất kỳ sự gián đoạn dịch vụ Internet@ TV nào do nhà cung cấp dịch vụ gây ra vì bất kỳ lý...
- Page 123 Thông tin đăng nhập Tài khoản Thiết lập Hệ thống Để có trải nghiệm ứng dụng tuyệt vời hơn, hãy Reset đăng ký và đăng nhập vào tài khoản của bạn. Để thực hiện điều này, trước hết bạn phải tạo tài Thiết lập lại cài đặt Internet@TV về...
- Page 124 Dịch vụ Mạng Trình quản lý Dịch vụ Sử dụng các nút màu với Samsung Apps ĐỎ (A) (Login) • : Để đăng nhập vào dịch vụ Xoá và khoá các ứng dụng đã được cài đặt cho internet. Internet@ TV.
- Page 125 BD-LIVE. với PC qua mạng (Xem trang 27~28) và cài đặt Trình quản lý Chia sẻ PC của SAMSUNG trên PC. Kiểm tra kích thước bộ nhớ còn trống. Để cài đặt và sử dụng Trình quản lý Chia sẻ, hãy Thiết bị...
- Page 126 ĐỎ (A) hoặc Để chọn thiết bị, sử dụng nút XANH LAM (D) để chọn tập tin để phát. (Để mở tập tin Video, Nhạc hoặc Ảnh, hãy tham khảo trang 45~52.) SAMSUNG PC Share Manager File Share Server Help...
- Page 127 Phụ lục Khắc phục sự cố Trước khi yêu cầu bảo hành, hãy kiểm tra những điều sau. SỰ CỐ GIẢI PHÁP Không thực hiện được thao tác nào với điều • Kiểm tra pin trong điều khiển từ xa. Có thể cần thay mới pin. khiển từ...
- Page 128 • Nếu vẫn không giải quyết được sự cố, hãy liên hệ với trung tâm dịch vụ được Samsung uỷ quyền gần nhất. Hình bị nhiễu hoặc biến dạng • Đảm bảo rằng đĩa không bị bẩn hay xước.
- Page 129 SỰ CỐ GIẢI PHÁP BD-LIVE Tôi không thể kết nối với máy chủ BD-LIVE. • Kiểm tra xem kết nối mạng có thành công hay không bằng cách sử dụng menu Kiểm tra Mạng. (Xem trang 42) • Kiểm tra xem thiết bị nhớ USB có được kết nối với sản phẩm hay không. •...
- Page 130 Phụ lục Thông số kỹ thuật Trọng lượng 1,8 kg Kích thước 430 (R) × 205 (C) × 43 (D) mm Tổng quát Dải Nhiệt độ Hoạt động +5°C đến +35°C Dải Độ ẩm Hoạt động 10 % tới 75 % BD (Đĩa Blu-ray) Tốc độ...
- Page 131 Nếu bạn gặp sự cố liên quan đến tính tương thích của đĩa hoặc hoạt động của sản phẩm, hãy liên hệ với trung tâm chăm sóc khách hàng của SAMSUNG. Bạn cũng có thể liên hệ với trung tâm chăm sóc khách hàng của SAMSUNG để có bản cập nhật của sản phẩm này.
- Page 132 CONTENT OR SERVICE BY YOU OR ANY THIRD PARTY, EVEN IF ADVISED OF THE POSSIBILITY OF SUCH DAMAGES. Third party services may be terminated or interrupted at any time, and Samsung makes no representation or warranty that any content or service will remain available for any period of time. Content and services are transmitted by third parties by means of networks and transmission facilities over which Samsung has no control.
- Page 133 Giấy phép • Được sản xuất theo giấy phép của Dolby Laboratories. “Dolby” và biểu tượng hai chữ D là thương hiệu của Dolby Laboratories. • Được sản xuất theo giấy phép của các nhà sáng chế Hoa Kỳ số : 5,451,942; 5,956,674;...
- Page 134 Liên hệ với SAMSUNG TRÊN TOÀN THẾ GIỚI Nếu bạn có bất kỳ thắc mắc hoặc nhận xét nào liên quan đến sản phẩm của Samsung, hãy liên hệ với trung tâm chăm sóc khách hàng của SAMSUNG. Area Web Site...
- Page 135 AK68-01945U...