1
2
3
4
5
6
7
8
9
10
11
12
13
14
15
16
17
18
19
20
21
22
23
24
25
26
27
28
29
30
31
32
33
34
35
36
37
38
39
40
41
42
43
44
45
46
47
48
49
50
51
52
53
54
55
56
57
58
59
60
61
62
63
64
65
66
67
68
69
70
71
72
73
74
75
76
77
78
79
80
81
82
83
84
85
86
87
88
89
90
91
92
93
94
95
96
97
98
99
100
101
102
103
104
105
106
107
108
109
110
111
112
113
114
115
116
117
118
119
120
121
122
123
124
125
126
127
128
129
130
131
132
133
134
135
136
137
138
139
140
141
142
143
144
145
146
147
148
149
150
151
152
153
154
155
156
157
158
159
160
161
162
163
164
165
166
167
168
169
170
171
172
173
174
175
176
177
178
179
180
181
182
183
184
185
186
187
188
189
190
191
192
193
194
195
196
197
198
199
200
201
202
203
204
205
206
207
208
209
210
211
212
213
214
215
216
217
218
219
220
221
222
223
224
225
226
227
228
229
230
231
232
233
234
235
236
237
238
239
240
241
242
243
244
245
246
247
248
249
250
251
252
253
254
255
256
257
258
259
260
261
262
263
264
Table Of Contents
265
Table of Contents
Table of Contents
Troubleshooting

Summary of Contents for HP C410 series
- Page 1 HP Photosmart Premium Fax C410 series Downloaded from ManualsPrinter.com Manuals...
- Page 2 Downloaded from ManualsPrinter.com Manuals...
-
Page 3: Table Of Contents
Contents HP Photosmart Premium Fax C410 series Help..............3 How do I?...........................5 Finish setting up the HP Photosmart Add the HP Photosmart to a network..................7 Set up the HP Photosmart for faxing..................16 Get to know the HP Photosmart Printer parts..........................37 Control panel features......................40 Display icons..........................41... -
Page 4: Table Of Contents
Improve print quality.......................119 Print troubleshooting.......................126 Memory card troubleshooting....................131 Scan troubleshooting......................134 Copy troubleshooting......................137 Fax troubleshooting........................142 Errors............................191 14 Technical information Notice............................237 Cartridge chip information......................237 Specifications.........................238 Environmental product stewardship program.................240 Regulatory notices........................246 Regulatory wireless statements....................249 Regulatory telecommunication notices...................252 Japan safety statement......................256 Index............................259 Downloaded from ManualsPrinter.com Manuals... -
Page 5: Hp Photosmart Premium Fax C410 Series Help
Finish setting up the HP Photosmart • Get to know the HP Photosmart • Print • Scan • Copy • • Save photos • Work with cartridges • Solve a problem • Technical information HP Photosmart Premium Fax C410 series Help Downloaded from ManualsPrinter.com Manuals... - Page 6 Chapter 1 HP Photosmart Premium Fax C410 series Help Downloaded from ManualsPrinter.com Manuals...
- Page 7 How do I? This section contains links to commonly performed tasks, such as printing photos, scanning, and making copies. • Print a variety of documents • Send and receive faxes • • Scan documents and photos Load paper • Make a copy •...
- Page 8 Chapter 2 How do I? Downloaded from ManualsPrinter.com Manuals...
-
Page 9: Finish Setting Up The Hp Photosmart Add The Hp Photosmart To A Network
Wireless without a router (ad hoc connection) WiFi Protected Setup (WPS) To connect the HP Photosmart to a wireless network using WiFi Protected Setup (WPS), you will need the following: A wireless 802.11 network that includes a WPS-enabled wireless router or access point. - Page 10 HP Photosmart on. Broadband Internet access (recommended) such as cable or DSL. If you connect the HP Photosmart on a wireless network that has Internet access, HP recommends that you use a wireless router (access point or base station) that uses Dynamic Host Configuration Protocol (DHCP).
- Page 11 Once connected, you can install the HP Photosmart software. Turn on the wireless radio for the HP Photosmart and the wireless radio on your computer. On your computer, connect to the network name (SSID) hp (product model).(6-digit unique identifier), which is the default ad hoc network created by the HP Photosmart.
- Page 12 The product comes configured with a network profile with hp (product model).(6-digit unique identifier) as the network name (SSID). However, for security and privacy HP recommends you create a new network profile on your computer as described here. To create a network profile (Windows Vista)
- Page 13 The networks with the strongest signal appear first, the weakest appear last. On the display, look for the network name you created on your computer (for example, Mynetwork). Add the HP Photosmart to a network Downloaded from ManualsPrinter.com Manuals...
- Page 14 You can print the Wireless Network Test report at the end of a successful Wireless Setup Wizard connection which can help identify any potential future issues with the network setup. Finish setting up the HP Photosmart Downloaded from ManualsPrinter.com Manuals...
- Page 15 Install the software for a network connection Wired (Ethernet) network Before you connect the HP Photosmart to a network, make sure you have all of the required materials. A functional Ethernet network that includes a router, switch, or hub with an Ethernet port.
- Page 16 Before you install the software, make sure you have connected the HP Photosmart to a network. If the HP Photosmart has not been connected to a network, follow the onscreen instructions during the software installation to connect the product to the network.
- Page 17 To verify the wireless connection, check the blue wireless light on the Wireless button. ◦ If the light is off, this indicates that the wireless radio is off and the HP Photosmart is not connected to the network. ◦ If the light is on, this indicates that the wireless radio is on and there is a network connection.
-
Page 18: Set Up The Hp Photosmart For Faxing
Chapter 3 Set up the HP Photosmart for faxing Before you begin setting up the HP Photosmart for faxing, determine which kind of phone system your country/region uses. The instructions for setting up the HP Photosmart for faxing differ depending on whether you have a serial- or parallel-type phone system. - Page 19 To determine the best way to set up the HP Photosmart in your home or office, first read through the questions in this section and record your answers. Next, refer to the table in the following section and choose the recommended setup case based on your answers.
- Page 20 Select your fax setup case Now that you have answered all the questions about the equipment and services that share the phone line with the HP Photosmart, you are ready to choose the best setup case for your home or office.
- Page 21 1-LINE on the back of the HP Photosmart. If you use another phone cord, you might experience problems sending and receiving faxes.
- Page 22 Figure 3-1 Back view of the HP Photosmart 1 Telephone wall jack 2 Use the phone cord supplied in the box with the HP Photosmart to connect to the "1-LINE" port To set up the HP Photosmart with a separate fax line...
- Page 23 1 Telephone wall jack 2 DSL filter and cord supplied by your DSL provider 3 Use the phone cord supplied in the box with the HP Photosmart to connect to the "1-LINE" port To set up the HP Photosmart with DSL Obtain a DSL filter from your DSL provider.
- Page 24 Run a fax test. Case C: Set up the HP Photosmart with a PBX phone system or an ISDN line If you are using either a PBX phone system or an ISDN converter/terminal adapter, make sure you do the following: •...
- Page 25 Figure 3-3 Back view of the HP Photosmart 1 Telephone wall jack 2 Use the phone cord supplied in the box with the HP Photosmart to connect to the "1-LINE" port To set up the HP Photosmart with a distinctive ring service...
- Page 26 Figure 3-4 Back view of the HP Photosmart 1 Telephone wall jack 2 Use the phone cord supplied in the box with the HP Photosmart to connect to the "1-LINE" port 3 Telephone (optional) To set up the HP Photosmart with a shared voice/fax line...
- Page 27 Figure 3-5 Back view of the HP Photosmart 1 Telephone wall jack 2 Use the phone cord supplied in the box with the HP Photosmart to connect to the "1-LINE" port Set up the HP Photosmart for faxing...
- Page 28 Internet. Figure 3-6 Back view of the HP Photosmart 1 Telephone wall jack 2 Use the phone cord supplied in the box with the HP Photosmart to connect to the "1-LINE" port 3 Computer with modem Finish setting up the HP Photosmart Downloaded from ManualsPrinter.com Manuals...
- Page 29 To set up the HP Photosmart with a computer dial-up modem Remove the white plug from the port labeled 2-EXT on the back of the HP Photosmart. Find the phone cord that connects from the back of your computer (your computer dial-up modem) to a telephone wall jack.
- Page 30 4 Telephone 5 Computer with modem 6 Use the phone cord supplied in the box with the HP Photosmart to connect to the "1-LINE" port To set up the HP Photosmart on the same phone line as a computer with two phone ports Remove the white plug from the port labeled 2-EXT on the back of the HP Photosmart.
- Page 31 Answer setting. Run a fax test. If you pick up the phone before the HP Photosmart answers the call and hear fax tones from a sending fax machine, you will need to answer the fax call manually. Set up the HP Photosmart for faxing...
- Page 32 3 "OUT" port on your answering machine 4 Telephone (optional) 5 Answering machine 6 Use the phone cord supplied in the box with the HP Photosmart to connect to the "1-LINE" port To set up the HP Photosmart with a shared voice/fax line with answering machine Remove the white plug from the port labeled 2-EXT on the back of the HP Photosmart.
- Page 33 "listening" for fax tones. If incoming fax tones are detected, the HP Photosmart will emit fax reception tones and receive the fax; if there are no fax tones, the HP Photosmart stops monitoring the line and your answering machine can record a voice message.
- Page 34 5 Answering machine 6 Computer with modem 7 Use the phone cord supplied in the box with the HP Photosmart to connect to the "1-LINE" port To set up the HP Photosmart on the same phone line as a computer with two phone ports Remove the white plug from the port labeled 2-EXT on the back of the HP Photosmart.
- Page 35 "listening" for fax tones. If incoming fax tones are detected, the HP Photosmart will emit fax reception tones and receive the fax; if there are no fax tones, the HP Photosmart stops monitoring the line and your answering machine can record a voice message.
- Page 36 Internet. There are two different ways to set up the HP Photosmart with your computer based on the number of phone ports on your computer. Before you begin, check your computer to see if it has one or two phone ports.
- Page 37 4 Telephone 5 Computer with modem 6 Use the phone cord supplied in the box with the HP Photosmart to connect to the "1-LINE" port To set up the HP Photosmart on the same phone line as a computer with two phone ports Remove the white plug from the port labeled 2-EXT on the back of the HP Photosmart.
- Page 38 HP Photosmart will not be able to receive faxes. Turn off the Auto Answer setting. Run a fax test. You must be available to respond in person to incoming fax calls, or the HP Photosmart cannot receive faxes. Additional fax setup information For additional fax setup information, in specific countries/regions, see the Fax Configuration Web site listed below.
-
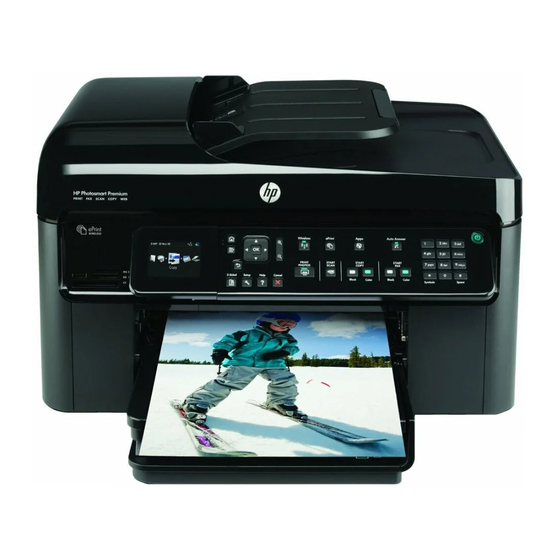
Page 39: Get To Know The Hp Photosmart Printer Parts
Get to know the HP Photosmart • Printer parts • Control panel features • Display icons • HP Apps Manager Printer parts • Front view of the printer Get to know the HP Photosmart Downloaded from ManualsPrinter.com Manuals... - Page 40 16 Cartridge door access handle 17 Paper-width guide for the main input tray 18 Main input tray (also referred to as the input tray) • Top and rear views of the printer Get to know the HP Photosmart Downloaded from ManualsPrinter.com Manuals...
- Page 41 22 Cartridge access area 23 Model number location 24 Rear USB port 25 Ethernet port 26 Power connection (Use only with the power adapter supplied by HP.) 27 1-LINE (fax) and 2-EXT (phone) ports 28 Two-sided printing accessory Printer parts...
-
Page 42: Control Panel Features
15 On: Turns the product on or off. When the product is off, a minimal amount of power is still used. To completely remove power, turn off the product, then unplug the power cord. 16 Space: Enters spaces and pound signs for fax-related tasks. Get to know the HP Photosmart Downloaded from ManualsPrinter.com Manuals... -
Page 43: Display Icons
Indicates that there is a wired network connection. Shows that the HP Photosmart is set up to receive faxes automatically. If this icon is not showing, you will have to receive faxes manually. Indicates the presence and signal strength of a wireless network connection. -
Page 44: Hp Apps Manager
▲ Add new HP Apps. a. Press the arrow buttons to scroll to the HP Apps menu option. Press OK. b. Press the arrow buttons to scroll to the More menu option, and then press OK. c. Highlight the desired app that you want to add, and then press OK. Follow the prompts. - Page 45 Paper basics You can load many different types and sizes of paper in the HP Photosmart, including letter or A4 paper, photo paper, transparencies, and envelopes. This section contains the following topics: • Recommended papers for photo printing • Recommended papers for printing •...
- Page 46 Chapter 5 Recommended papers for printing If you want the best print quality, HP recommends using HP papers that are specifically designed for the type of project you are printing. Depending on your country/region, some of these papers might not be available.
- Page 47 HP Iron-On Transfers HP Iron-on Transfers (for color fabrics or for light or white fabrics) are the ideal solution for creating custom T-shirts from your digital photos. HP Premium Inkjet Transparency Film HP Premium Inkjet Transparency Film makes your color presentations vivid and even more impressive.
- Page 48 Chapter 5 b. Load paper. Insert stack of photo paper into photo tray with short edge forward and print side down. Slide stack of paper forward until it stops. NOTE: If the photo paper you are using has perforated tabs, load photo paper so that tabs are closest to you.
- Page 49 Load A4 or 8.5 x 11 inch paper a. Raise output tray. Raise output tray and slide paper-width guide outwards. b. Load paper. Insert stack of paper into main input tray with short edge forward and print side down. Slide stack of paper forward until it stops. Slide paper-width guide inward until it stops at edge of paper.
- Page 50 Chapter 5 NOTE: When you use legal-size paper, leave the paper catch closed. Load envelopes a. Raise output tray. Raise output tray and slide paper-width guide outwards. Remove all paper from the main input tray. b. Load envelopes. Insert one or more envelopes into far-right side of main input tray, with envelope flaps on left and facing up.
- Page 51 Information on paper Information on paper The HP Photosmart is designed to work well with most paper types. Test a variety of paper types before buying a large quantity. Find a paper type that works well and is easy to purchase. HP papers are designed for the best quality results. In addition, follow these tips: •...
- Page 52 Chapter 5 Paper basics Downloaded from ManualsPrinter.com Manuals...
- Page 53 Print Print documents Print photos Print a creative project Print a Web page Print forms and templates (Quick Forms) Print from anywhere Print from the Web without a computer Related topics • Load media • Recommended papers for photo printing •...
-
Page 54: Print Photos
Chapter 6 If you need to change settings, click the button that opens the Properties dialog box. Depending on your software application, this button might be called Properties, Options, Printer Setup, Printer, or Preferences. NOTE: When printing a photo, you must select options for the specific photo paper and photo enhancement. - Page 55 Print quality drop-down list, you can enable it from the Advanced tab. For more information, see Print using the maximum dpi. In the HP Real Life Technologies area, click the Photo fix drop-down list and select from the following options: • Off: applies no HP Real Life Technologies to the image.
- Page 56 Chapter 6 b. Insert memory. 1 Memory Stick, Memory Stick Pro, Memory Stick Select, Memory Stick Magic Gate, Memory Stick Duo or Pro Duo (adapter optional), Memory Stick Pro-HG Duo (adapter optional), or Memory Stick Micro (adapter required) 2 MultiMediaCard (MMC), MMC Plus, Secure MultiMedia Card, MMC Mobile (RS-MMC; adapter required), Secure Digital (SD), Secure Digital Mini (adapter required), Secure Digital High Capacity (SDHC), TransFlash MicroSD Card (adapter required), or xD- Picture card...
- Page 57 Increase number of copies and press OK. Press OK to preview print job. d. Print photo. Press Print Photos. Print single photo on full-size paper a. Load paper. Load full-size paper in the main input tray. b. Insert memory. Print photos Downloaded from ManualsPrinter.com Manuals...
- Page 58 Chapter 6 1 Memory Stick, Memory Stick Pro, Memory Stick Select, Memory Stick Magic Gate, Memory Stick Duo or Pro Duo (adapter optional), Memory Stick Pro-HG Duo (adapter optional), or Memory Stick Micro (adapter required) 2 MultiMediaCard (MMC), MMC Plus, Secure MultiMedia Card, MMC Mobile (RS-MMC; adapter required), Secure Digital (SD), Secure Digital Mini (adapter required), Secure Digital High Capacity (SDHC), TransFlash MicroSD Card (adapter required), or xD- Picture card...
- Page 59 Print multiple photos on full-size paper a. Load paper. Load full-size paper in the main input tray. b. Insert memory. 1 Memory Stick, Memory Stick Pro, Memory Stick Select, Memory Stick Magic Gate, Memory Stick Duo or Pro Duo (adapter optional), Memory Stick Pro-HG Duo (adapter optional), or Memory Stick Micro (adapter required) 2 MultiMediaCard (MMC), MMC Plus, Secure MultiMedia Card, MMC Mobile (RS-MMC;...
-
Page 60: Print A Creative Project
Chapter 6 c. Select photo. Highlight View & Print and press OK. Highlight photo and press OK. Increase number of copies and press OK. d. Change page layout. Press OK to preview print job. Press Menu to change print settings. Highlight Layout and press OK. - Page 61 1 Memory Stick, Memory Stick Pro, Memory Stick Select, Memory Stick Magic Gate, Memory Stick Duo or Pro Duo (adapter optional), Memory Stick Pro-HG Duo (adapter optional), or Memory Stick Micro (adapter required) 2 MultiMediaCard (MMC), MMC Plus, Secure MultiMedia Card, MMC Mobile (RS-MMC; adapter required), Secure Digital (SD), Secure Digital Mini (adapter required), Secure Digital High Capacity (SDHC), TransFlash MicroSD Card (adapter required), or xD- Picture card...
- Page 62 Chapter 6 b. Insert memory. 1 Memory Stick, Memory Stick Pro, Memory Stick Select, Memory Stick Magic Gate, Memory Stick Duo or Pro Duo (adapter optional), Memory Stick Pro-HG Duo (adapter optional), or Memory Stick Micro (adapter required) 2 MultiMediaCard (MMC), MMC Plus, Secure MultiMedia Card, MMC Mobile (RS-MMC; adapter required), Secure Digital (SD), Secure Digital Mini (adapter required), Secure Digital High Capacity (SDHC), TransFlash MicroSD Card (adapter required), or xD- Picture card...
- Page 63 d. Select photo. Highlight photo and press OK. Increase number of copies and press OK. Press OK to preview print job. e. Print photo. Press Print Photos. Print wallet photos a. Load paper. Load up to 13 x 18 cm (5 x 7 inch) photo paper in photo tray or full-size photo paper in main input tray.
- Page 64 Chapter 6 c. Select project type. Highlight Create and press OK. Highlight Wallet Photos and press OK. d. Follow prompts. Print passport photos a. Load paper. Load up to 13 x 18 cm (5 x 7 inch) photo paper in photo tray or full-size photo paper in main input tray.
- Page 65 Reprint photos a. Load original. Lift lid on product. Load original print side down on right front corner of glass. Close lid. b. Load paper. Load up to 13 x 18 cm (5 x 7 inch) photo paper in photo tray or full-size photo paper in main input tray.
-
Page 66: Print Forms And Templates (Quick Forms)
You can print a Web page from the Web browser your computer on the HP Photosmart. If you use Internet Explorer (6.0 or higher) or Firefox (2.0 or higher), you can use HP Smart Web Printing to ensure simple, predictable web printing with control over what you want and how you want it printed. - Page 67 To get the most benefit from maximum dpi mode, use it to print high-quality images such as digital photographs. When you select the maximum dpi setting, the printer software displays the optimized dots per inch (dpi) that the HP Photosmart printer will print. Printing in maximum dpi is supported on the following paper-types only: •...
- Page 68 • Photo Printing–Borderless: Print to the top, bottom, and side edges of 10 x 15 cm (4 x 6 inch) and 13 x 18 cm (5 x 7 inch) HP Photo Papers. • Paper-saving Printing: Print two-sided documents with mutliple pages on same sheet to reduce paper usage.
- Page 69 Print dialog box from within your software application. To change the default print settings In the HP Solution Center, click Settings, point to Print Settings, and then click Printer Settings. Make changes to the print settings, and click OK.
- Page 70 Chapter 6 Crop photo a. Select photo. Highlight View & Print and press OK. Highlight photo and press OK. b. Edit photo. Press Menu. Highlight Crop and press OK. Press OK when done. Photo fix a. Select photo. Highlight View & Print and press OK. Highlight photo and press OK.
-
Page 71: Print From Anywhere
View the animation for this topic. Print from anywhere HP ePrint is a free service from HP that allows you to print from your mobile device or computer anytime, anywhere. Just send an email to your printer's email address, and the email message and any supported file attachments you included in the email will print. - Page 72 HP ePrint settings. This report includes the email address for your printer. Make a note of this email address as you will need it to use HP ePrint. Sign up online with HP ePrint, where you can set security options and check the status of the print job.
-
Page 73: Print From The Web Without A Computer
Get started using HP Apps To use HP Apps, you need to have your printer connected to a network and to the Internet. If you did not do this during setup, refer to the following steps. To connect to the Internet Press the ePrint button. - Page 74 Chapter 6 Print Downloaded from ManualsPrinter.com Manuals...
-
Page 75: Scan Scan To A Computer
Scan • Scan to a computer • Scan to a memory card or USB storage device TIP: You can also scan and reprint a photo. For more information, see Print a creative project. Scan to a computer Do one of the following: Single page scan a. -
Page 76: Scan To A Memory Card Or Usb Storage Device
Close lid. b. Start scan. Press Start Scan. Highlight Scan to Computer and press OK. Highlight HP Photosmart and press OK. Multiple page scan a. Load original. Remove any staples or clips from the original document. Slide original with print side up into document feeder tray until the product detects the pages. - Page 77 Load original print side down on right front corner of glass. Close lid. b. Insert memory. Scan to a memory card or USB storage device Downloaded from ManualsPrinter.com Manuals...
- Page 78 Chapter 7 1 Memory Stick, Memory Stick Pro, Memory Stick Select, Memory Stick Magic Gate, Memory Stick Duo or Pro Duo (adapter optional), Memory Stick Pro-HG Duo (adapter optional), or Memory Stick Micro (adapter required) 2 MultiMediaCard (MMC), MMC Plus, Secure MultiMedia Card, MMC Mobile (RS-MMC; adapter required), Secure Digital (SD), Secure Digital Mini (adapter required), Secure Digital High Capacity (SDHC), TransFlash MicroSD Card (adapter required), or xD- Picture card...
- Page 79 Slide paper-width guide inward until it stops at edge of paper. b. Insert memory. 1 Memory Stick, Memory Stick Pro, Memory Stick Select, Memory Stick Magic Gate, Memory Stick Duo or Pro Duo (adapter optional), Memory Stick Pro-HG Duo (adapter optional), or Memory Stick Micro (adapter required) 2 MultiMediaCard (MMC), MMC Plus, Secure MultiMedia Card, MMC Mobile (RS-MMC;...
- Page 80 Chapter 7 c. Start scan. Press Start Scan. Highlight Scan to Memory Card or Scan to USB Flash Drive and press Highlight desired option and press OK. View the animation for this topic. Related topics Stop the current job Scan Downloaded from ManualsPrinter.com Manuals...
-
Page 81: Copy Copy Text Or Mixed Documents
Copy Copy text or mixed documents TIP: You can also copy and reprint a photo. For more information, see Print a creative project Copy text or mixed documents Do one of the following: 1-sided original to 1-sided copy a. Load paper. Load full-size paper in the main input tray. - Page 82 Chapter 8 Close lid. c. Specify number of copies. Highlight Copy and press OK. Press up arrow button or use keypad to increase number of copies . d. Start copy. Press Start Copy. 1-sided original to 2-sided copy a. Load paper. Load full-size paper in the main input tray.
- Page 83 NOTE: You can also load the original print side down on the right front corner on the glass. Slide paper-width guide inward until it stops at edge of paper. c. Specify 2-sided option. Press 2-Sided on control panel. Highlight Copy and press OK. Highlight 1-Sided Original 2-Sided Copy and press OK.
- Page 84 Chapter 8 d. Specify number of copies. Press up arrow button or use keypad to increase number of copies . e. Start copy. Press Start Copy. 2-sided original to 1-sided copy a. Load paper. Load full-size paper in the main input tray. b.
- Page 85 Paper type Control panel setting Copier paper or letterhead Plain Paper HP Bright White Paper Plain Paper HP Premium Plus Photo Paper, Glossy Premium Photo HP Premium Plus Photo Paper, Matte Premium Photo Change the copy settings Downloaded from ManualsPrinter.com Manuals...
- Page 86 Chapter 8 Paper type Control panel setting HP Premium Plus 10 x 15 cm (4 x 6 inch) Premium Photo Photo Paper HP Photo Paper Photo Paper HP Everyday Photo Paper Everyday Photo HP Everyday Photo Paper, Semi Gloss Everyday Matte...
- Page 87 Press the left arrow button to lighten the copy. Press OK. Preview a copy before printing After changing settings on the HP Photosmart for making a copy, you can preview an image of the expected output on the display before starting the copy. NOTE: To ensure an accurate preview, change the paper size and type to reflect the actual paper you have loaded in the input tray.
- Page 88 Chapter 8 Copy Downloaded from ManualsPrinter.com Manuals...
- Page 89 • Send a fax • Receive a fax Send a fax Do one of the following: Fax photo a. Load original. Lift lid on product. Load original print side down on right front corner of glass. Downloaded from ManualsPrinter.com Manuals...
- Page 90 Chapter 9 Close lid. b. Press Start Fax and wait for tone. c. Enter number. Fax 1–sided document a. Load original. Remove any staples or clips from the original document. Slide original with print side up into document feeder tray until the product detects the pages.
- Page 91 Slide paper-width guide inward until it stops at edge of paper. b. Specify 2-sided option. Press 2-Sided on control panel. Highlight Fax Send and press OK. Highlight 2-Sided Original and press OK. c. Press Start Fax and wait for tone. d.
- Page 92 HP Photosmart. NOTE: Do not use the keypad on the control panel of the HP Photosmart. You must use the keypad on your phone to dial the recipient's number. If the recipient answers the telephone, you can engage in a conversation before sending your fax.
- Page 93 Send Fax Later message is visible on the display. Set up and use speed dial You can quickly send a black-and-white or color fax from the HP Photosmart using speed dials. This section provides instructions for sending the fax in black and white.
-
Page 94: Receive A Fax
Press Start Fax. • If the device detects an original loaded in the automatic document feeder, the HP Photosmart sends the document to the number you entered. • If the device does not detect an original loaded in the automatic document feeder, the Feeder Empty prompt appears. - Page 95 Directly connected to the HP Photosmart (on the 2-EXT port) • On the same phone line, but not directly connected to the HP Photosmart To receive a fax manually Make sure the product is turned on and you have paper loaded in the input tray.
- Page 96 Chapter 9 Downloaded from ManualsPrinter.com Manuals...
-
Page 97: Save Photos Save Photos To Your Computer
10 Save photos • Save photos to your computer • Back up photos from a memory card to a USB storage device Save photos to your computer To save photos Insert memory. 1 Memory Stick, Memory Stick Pro, Memory Stick Select, Memory Stick Magic Gate, Memory Stick Duo or Pro Duo (adapter optional), Memory Stick Pro-HG Duo (adapter optional), or Memory Stick Micro (adapter required) 2 MultiMediaCard (MMC), MMC Plus, Secure MultiMedia Card, MMC Mobile (RS-MMC;... -
Page 98: Back Up Photos From A Memory Card To A Usb Storage Device
Chapter 10 Save photos. ▲ Highlight Save and press OK. NOTE: If product is network-connected, a list of available computers appears. Select computer to which you want to transfer photos, and then continue to next step. Follow Prompts. ▲ Follow onscreen prompts on computer to save photos to computer. View the animation for this topic. - Page 99 1 Memory Stick, Memory Stick Pro, Memory Stick Select, Memory Stick Magic Gate, Memory Stick Duo or Pro Duo (adapter optional), Memory Stick Pro-HG Duo (adapter optional), or Memory Stick Micro (adapter required) 2 MultiMediaCard (MMC), MMC Plus, Secure MultiMedia Card, MMC Mobile (RS-MMC; adapter required), Secure Digital (SD), Secure Digital Mini (adapter required), Secure Digital High Capacity (SDHC), TransFlash MicroSD Card (adapter required), or xD- Picture card...
- Page 100 Chapter 10 Save photos Downloaded from ManualsPrinter.com Manuals...
-
Page 101: Work With Cartridges Check The Estimated Ink Levels
In addition, some residual ink is left in the cartridge after it is used. For more information, see www.hp.com/go/inkusage. To check the ink levels from the control panel Press Setup. -
Page 102: Order Ink Supplies
Order ink supplies Order ink supplies To learn which HP supplies work with your product, order supplies online, or create a printable shopping list, open HP Solution Center and select the online shopping feature. Cartridge information and links to online shopping also appear on ink alert messages. In addition, you can find cartridge information and order online by visiting www.hp.com/buy/... - Page 103 Wait for print carriage to move to center of the product. b. Press tab on cartridge, then remove it from slot. Insert new cartridge. a. Remove cartridge from packaging. b. Twist orange cap to snap it off. A forceful twist may be required to remove the cap.
-
Page 104: Cartridge Warranty Information
During the warranty period the product is covered as long as the HP ink is not depleted and the end of warranty date has not been reached. The end of warranty date, in YYYY/... -
Page 105: Print And Evaluate A Print Quality Report
HP Photosmart. If you are unhappy with the quality of your prints, you can print a print quality report to help you determine if the printing system is working properly. - Page 106 Chapter 11 NOTE: Ink level warnings and indicators provide estimates for planning purposes only. When you receive a low-ink warning message, consider having a replacement cartridge available to avoid possible printing delays. You do not need to replace the ink cartridges until print quality becomes unacceptable. Look at the color bars in the middle of the page.
- Page 107 NOTE: If replacing the cartridge does not solve this print quality issue, contact HP support for service. • If any of the color bars show regular white streaks, refer to the following steps. ◦...
- Page 108 Figure 11-9 Alignment pattern - jagged lines NOTE: If aligning the printer does not solve this print quality issue, contact HP support for service. If you do not see any defects on the print quality report, then the printing system is working correctly.
- Page 109 If you have a problem, follow these steps: Check the documentation that came with the product. Visit the HP online support Web site at www.hp.com/support. HP online support is available to all HP customers. It is the fastest source for up-to-date product information and expert assistance and includes the following features: •...
- Page 110 (including Mexico). To determine the duration of phone support in Europe, the Middle East, and Africa, go to www.hp.com/support. Standard phone company charges apply. Placing a call Call HP support while you are in front of the computer and the product. Be prepared to provide the following information: •...
- Page 111 ﺍﻷﺭﺩﻥ ﺍﻟﺠﺰﺍﺋﺮ ﺍﻟﺒﺤﺮﻳﻦ ﻋ ُ ﻤﺎﻥ ℡ ℡ ﻣﺼﺮ ﺍﻟﺴﻌﻮﺑﻴﺔ ﺗﻮﻧﺲ ﺍﻟﻌﺮﺍﻕ ﺍﻟﻜﻮﻳﺖ ﻟﺒﻨﺎﻥ ﻗﻄﺮ ﺍﻟﻴﻤﻦ ﺍﻹﻣﺎﺭﺍﺕ ﺍﻟﻌﺮﺑﻴﺔ ﺍﻟﻤﺘﺤﺪﺓ HP support Downloaded from ManualsPrinter.com Manuals...
-
Page 112: Setup Troubleshooting
Chapter 12 After the phone support period After the phone support period, help is available from HP at an additional cost. Help may also be available at the HP online support Web site: www.hp.com/support. Contact your HP dealer or call the support phone number for your country/region to learn more about support options. - Page 113 • Solution 3: Press the On button more slowly • Solution 4: Contact HP to replace the power supply • Solution 5: Contact HP support for service Solution 1: Make sure you use the power cord that came with the product Solution: •...
- Page 114 If this did not solve the issue, try the next solution. Solution 4: Contact HP to replace the power supply Solution: Contact HP support to request a power supply for the product. Go to: www.hp.com/support. If prompted, choose your country/region, and then click Contact HP for information on calling for technical support.
- Page 115 For more information on installing the software and connecting the USB cable, see the Start Here guide that came with the product. Cause: The USB cable was connected before the software was installed. Connecting the USB cable before you are prompted can cause errors. After setting up the product, it does not print Try the following solutions to resolve the issue.
- Page 116 Chapter 12 If this did not solve the issue, try the next solution. Solution 3: Check the connection between the product and computer Solution: Check the connection between the product and computer. Cause: The product and computer were not communicating with each other. If this did not solve the issue, try the next solution.
- Page 117 Press the down arrow button to scroll through the countries/regions. When the country/region you want to use is highlighted, press OK. When prompted, press the down arrow button to highlight Yes for confirmation, and then press OK. Cause: You might have selected the incorrect country/region when setting up the product.
- Page 118 On the Windows taskbar, click Start, Settings, Control Panel, (or just Control Panel). b. Double-click Add/Remove Programs (or click Uninstall a program). c. Remove all the items that are related to the HP Photosmart Software. CAUTION: If the computer is manufactured by HP or Compaq, do not remove any applications other than those listed below.
- Page 119 Occasionally, TSR's prevent the HP software from loading so that it does not install properly. In Windows Vista and Windows XP, use the MSCONFIG utility to prevent TSR programs and services from starting up.
- Page 120 Do not simply delete the HP Photosmart application files from your computer. Make sure to remove them properly using the uninstall utility provided when you installed the software that came with the HP Photosmart.
-
Page 121: Improve Print Quality
Follow the onscreen instructions and the instructions provided in the Start Here guide that came with the product. When the software installation is complete, the HP Digital Imaging Monitor icon appears in the Windows system tray. Improve print quality Refer to this section to help resolve print quality issues such as wrong or bleeding colors, distortion, streaks, lines, faded, dull, or blurry printouts. - Page 122 NOTE: HP cannot guarantee the quality or reliability of non-HP supplies. Printer service or repairs required as a result of using a non-HP supply will not be covered under warranty. If you believe you purchased genuine HP ink cartridges, go to: www.hp.com/go/anticounterfeit...
- Page 123 c. Press the down arrow button to highlight Tools, and then press OK. d. Press the down arrow button to highlight Print Quality Report, and then press The product prints a print quality report that you can use to diagnose print quality issues.
- Page 124 NOTE: If replacing the cartridge does not solve this print quality issue, contact HP support for service. • If any of the color bars show regular white streaks, refer to the following steps. ◦...
- Page 125 c. Look at the large text above the alignment pattern. The type should be sharp and clear. Figure 12-4 Sample text area - expected result • If the type is jagged, align the printer, and then print this diagnostic page again. Figure 12-5 Sample text area - jagged text •...
- Page 126 To clean the cartridges from the software a. Load letter or A4 unused plain white paper into the input tray. b. In the HP Solution Center, click Settings. c. In the Print Settings area, click Printer Toolbox. d. Click the Device Services tab.
- Page 127 Or, choose a higher setting if you are printing a high-quality photo, and then make sure photo paper such as HP Advanced Photo Paper is loaded in the paper tray. For information on using the maximum dpi mode, see...
-
Page 128: Print Troubleshooting
Contact HP support for service. Go to: www.hp.com/support. If prompted, choose your country/region, and then click Contact HP for information on calling for technical support. Print troubleshooting Use this section to solve these printing problems: •... - Page 129 For more information, see: Load media Cause: A stack of envelopes was loaded incorrectly. If this did not solve the issue, try the next solution. Solution 2: Check the envelope type Solution: Do not use shiny or embossed envelopes or envelopes that have clasps or windows.
- Page 130 Chapter 12 The pages in my document came out in the wrong order Solution: Print the document in reverse order. When the document finishes printing, the pages will be in correct order. To print a multiple-page document in reverse order Make sure you have paper loaded in the input tray.
- Page 131 Make sure the margin settings for the document do not exceed the printable area of the product. To check your margin settings Preview your print job before sending it to the product. In most software applications, click the File menu, and then click Print Preview. Check the margins.
- Page 132 • Solution 2: Check the ink levels • Solution 3: Contact HP support Solution 1: Use a lower print quality setting Solution: Check the print quality setting. Best and Maximum dpi provide the best quality but are slower than Normal or Draft. Draft provides the fastest print speed.
-
Page 133: Memory Card Troubleshooting
Solution 3: Contact HP support Solution: Contact HP support for service. Go to: www.hp.com/support. If prompted, choose your country/region, and then click Contact HP for information on calling for technical support. Cause: There was a problem with the product. Memory card troubleshooting Use this section to solve these memory card problems: •... - Page 134 Chapter 12 • Solution 1: Insert the memory card properly • Solution 2: Insert the memory card fully into the appropriate slot on the product • Solution 3: Remove the additional memory card • Solution 4: Reformat the memory card in your digital camera Solution 1: Insert the memory card properly Solution: Turn the memory card so that the label faces up and the contacts are facing the product, and then push the card forward into the appropriate slot until the...
- Page 135 If the file system on the card is corrupt, reformat the memory card in your digital camera. For more information, see the documentation that came with your digital camera. CAUTION: Reformatting the memory card will delete any photos stored on the card.
-
Page 136: Scan Troubleshooting
Chapter 12 If this did not solve the issue, try the next solution. Solution 4: Check the connection from the product to your computer Solution: Check the connection from the product to your computer. Verify that the USB cable is securely plugged into the USB port on the back of the product. Make sure the other end of the USB cable is plugged into a USB port on your computer. - Page 137 • If you are loading your original in the document feeder tray, place the paper, with the print side up, in the tray as shown below. Place the pages in the tray so that the top of the document goes in first. NOTE: Do not load photos in the document feeder tray to copy.
- Page 138 Chapter 12 Scanned image shows dotted lines instead of text Solution: Make a black-and-white copy of the original and then scan the copy. Cause: If you used the Text image type to scan text that you planned to edit, the scanner might not have recognized color text.
-
Page 139: Copy Troubleshooting
NOTE: If you are using HP Photosmart Essential, the Optical Character Recognition (OCR) software might not be installed on your computer. To install the OCR software, you must re-insert the software disk and select OCR under the Custom installation options. - Page 140 Chapter 12 • If you are loading your original in the document feeder tray, place the paper, with the print side up, in the tray as shown below. Place the pages in the tray so that the top of the document goes in first. NOTE: Do not load photos in the document feeder tray to copy.
- Page 141 If this did not solve the issue, try the next solution. Solution 5: Check for a paper jam Solution: Clear the paper jam and remove any torn paper that remains in the product. NOTE: Remove any staples or clips from the original document. Cause: The product had a paper jam.
- Page 142 If you want to make a large copy of a small original, scan the original into the computer, resize the image in the HP scanning software, and then print a copy of the enlarged image.
- Page 143 NOTE: You cannot use the document feeder tray with the Fit to Page feature. To use the Fit to Page feature, the original must be placed print side down on the right front corner of the glass. Cause: The original was placed incorrectly on the glass or in the document feeder tray.
-
Page 144: Fax Troubleshooting
Chapter 12 NOTE: Do not load photos in the document feeder tray to copy. If you are copying a photo, place it on the glass. Cause: The original was placed incorrectly on the glass or in the document feeder tray. Fax troubleshooting Use this section to solve the following fax problems: •... - Page 145 Press the down arrow button to highlight Tools, and then press OK. Press the down arrow button to highlight Run Fax Test, and then press OK. The HP Photosmart displays the status of the test on the display and prints a report.
- Page 146 If the test fails, review the report for more information on how to fix any problems found. After you pick up the fax report from the HP Photosmart, press OK. If necessary, resolve any problems found and rerun the test.
- Page 147 Make sure you used the phone cord supplied in the box with the product to connect to the telephone wall jack. One end of this special 2-wire phone cord should be connected to the port labeled 1- LINE on the back of the product and the other end to your telephone wall jack, as shown below.
- Page 148 Chapter 12 Solution 4: Make sure other office equipment is connected correctly Solution: NOTE: This possible solution applies only in the countries/regions that receive a 2-wire phone cord in the box with the product, including: Argentina, Australia, Brazil, Canada, Chile, China, Colombia, Greece, India, Indonesia, Ireland, Japan, Korea, Latin America, Malaysia, Mexico, Philippines, Poland, Portugal, Russia, Saudi Arabia, Singapore, Spain, Taiwan, Thailand, USA, Venezuela, and Vietnam.
- Page 149 Cause: You were using a phone line splitter. If this did not solve the issue, try the next solution. Solution 6: Make sure the telephone wall jack works properly Solution: Try connecting a working telephone and phone cord to the telephone wall jack you are using for the product and check for a dial tone.
- Page 150 Chapter 12 Cause: Other equipment that uses the same phone line as the product might have been in use. If this did not solve the issue, try the next solution. Solution 9: Make sure the product is connected to an analog phone line Solution: Make sure you connect the product to an analog phone line or you will not be able to send or receive faxes.
- Page 151 If there is an error, the product will not send or receive a fax until the error condition is resolved. You can also check the status of the product by clicking Status in the HP Solution Center.
- Page 152 Chapter 12 Solution 14: Lower the fax speed Solution: You might need to send and receive faxes at a slower rate. Try setting the Fax Speed to Medium (14400) or Slow (9600) if you use one of the following: • An Internet phone service •...
- Page 153 Press the down arrow button to highlight Tools, and then press OK. Press the down arrow button to highlight Run Fax Test, and then press OK. The HP Photosmart displays the status of the test on the display and prints a report.
- Page 154 Chapter 12 Cause: The number you entered when sending the fax was not in the proper format. If this did not solve the issue, try the next solution. Solution 3: Dial the fax number more slowly Solution: Insert some pauses in the number sequence to slow the dialing pace. For example, if you need to access an outside line before dialing the phone number, insert a pause following the access number.
- Page 155 Solution 2: Connect the telephone to the correct port Solution: NOTE: This possible solution applies only in the countries/regions that receive a 2-wire phone cord in the box with the product, including: Argentina, Australia, Brazil, Canada, Chile, China, Colombia, Greece, India, Indonesia, Ireland, Japan, Korea, Latin America, Malaysia, Mexico, Philippines, Poland, Portugal, Russia, Saudi Arabia, Singapore, Spain, Taiwan, Thailand, USA, Venezuela, and Vietnam.
- Page 156 Chapter 12 Solution 4: Lower the fax speed Solution: You might need to send and receive faxes at a slower rate. Try setting the Fax Speed to Medium (14400) or Slow (9600) if you use one of the following: • An Internet phone service •...
- Page 157 Solution 2: Check the phone line for noise Solution: You can check the sound quality of the phone line by plugging a phone into the telephone wall jack and listening for static or other noise. If the failure was due to noise on the phone line, contact the sender to have them resend the fax. The quality might be better when you try again.
- Page 158 Chapter 12 Cause: Two or more pages were fed through the document feeder tray at the same time. The quality of the fax I sent is poor Try the following solutions to resolve the issue. Solutions are listed in order, with the most likely solution first.
- Page 159 If this did not solve the issue, try the next solution. Solution 3: Make sure the glass is clean Solution: If you are sending a fax from the glass, make a copy to check the quality of the printout. If the quality of the printout is poor, clean the glass. Cause: The glass of the product might have been dirty.
- Page 160 Chapter 12 Cause: The original was not loaded or was loaded incorrectly. Fax transmission is slow Try the following solutions to resolve the issue. Solutions are listed in order, with the most likely solution first. If the first solution does not solve the problem, continue trying the remaining solutions until the issue is resolved.
- Page 161 due to noise on the phone line, contact the sender to have them resend the fax. The quality might be better when you try again. If the problem persists, turn Error Correction Mode (ECM) off and contact your telephone company. To change the ECM setting from the control panel Press Setup.
- Page 162 Chapter 12 Press the down arrow button to highlight Fax Speed, and then press OK. Press the down arrow button to select one of the following settings, and then press Fax speed setting Fax speed Fast (33600) v.34 (33600 baud) Medium (14400) v.17 (14400 baud) Slow (9600)
- Page 163 If the call is a voice call, the answering machine will record the incoming message. For more information on setting up the product when you have an answering machine, Set up the HP Photosmart for faxing. Cause: The answering machine was not set up properly with the product or the number or rings to wait setting was not correct.
- Page 164 For more information, see Set up the HP Photosmart for faxing. Then, run a fax test to check the status of the product and to make sure you set it up properly.
- Page 165 Press the down arrow button to highlight Tools, and then press OK. Press the down arrow button to highlight Run Fax Test, and then press OK. The HP Photosmart displays the status of the test on the display and prints a report.
- Page 166 Chapter 12 Solution 4: If you have a computer dial-up modem on the same phone line as the product, make sure the modem software is not intercepting the fax Solution: If you have a computer dial-up modem on the same phone line as the product, check to make sure that the software that came with your modem is not set to receive faxes automatically.
- Page 167 If the call is a voice call, the answering machine will record the incoming message. For more information on setting up the product, see Set up the HP Photosmart for faxing. Cause: The answering machine was not set up properly with the product.
- Page 168 Chapter 12 NOTE: The product cannot recognize some ring patterns, such as those with alternating short and long ringing patterns. If you are having problems with a ring pattern of this type, ask your phone company to assign a non-alternating ring pattern.
- Page 169 the product from printing faxes, review the display for information on the error condition. Make sure: • The product is on. Press the On button to turn on the product. • The product is set up correctly for faxing. See the printed documentation for more information.
- Page 170 Chapter 12 NOTE: If the product has an alignment message, you might be able to press the button next to OK to clear the message and resume faxing. After you resolve any problems found, the product can begin answering incoming fax calls.
- Page 171 Press the down arrow button to highlight Fax Speed, and then press OK. Press the down arrow button to select one of the following settings, and then press Fax speed setting Fax speed Fast (33600) v.34 (33600 baud) Medium (14400) v.17 (14400 baud) Slow (9600) v.29 (9600 baud)
- Page 172 Chapter 12 Cause: An error condition was preventing the product from receiving faxes and Backup Fax Reception was set to Off. The product is not answering incoming fax calls Try the following solutions to resolve the issue. Solutions are listed in order, with the most likely solution first.
- Page 173 company has assigned your number a double ring pattern, make sure Double Rings is selected as the Distinctive Ring setting. NOTE: The product cannot recognize some ring patterns, such as those with alternating short and long ringing patterns. If you are having problems with a ring pattern of this type, ask your phone company to assign a non-alternating ring pattern.
- Page 174 Chapter 12 Resolve any problems found. The product automatically begins printing all the unprinted faxes from memory. To clear the memory, you can also delete the faxes stored in memory by turning off the product. Cause: The memory of the product was full. If this did not solve the issue, try the next solution.
- Page 175 NOTE: If the product has an alignment message, you might be able to press the button next to OK to clear the message and resume faxing. After you resolve any problems found, the product can begin answering incoming fax calls. Cause: An error condition was preventing the product from receiving faxes and Backup Fax Reception was set to Off.
- Page 176 Chapter 12 Solution 1: Clear any paper jams and make sure paper is loaded in the input tray Solution: The product might have a paper jam or be out of paper. If you have Backup Fax Reception enabled, the product might have stored the fax in memory upon reception.
- Page 177 The computer to which I am connecting has only one phone port Solution: This possible solution applies only in the countries/regions that receive a 2-wire phone cord in the box with the HP Photosmart, including: Argentina, Australia, Brazil, Canada, Chile, China, Colombia, Greece, India, Indonesia, Ireland, Japan, Korea, Latin America, Malaysia, Mexico, Philippines, Poland, Portugal, Russia, Saudi Arabia, Singapore, Spain, Taiwan, Thailand, USA, Venezuela, and Vietnam.
- Page 178 Chapter 12 splitter, or a parallel splitter which has two RJ-11 ports on the front and a plug on the back.) Figure 12-12 Example of a parallel splitter To set up the product on a shared fax/voice line with a computer dial-up modem Find the phone cord that connects from the back of your computer (your computer dial-up modem) to a telephone wall jack.
- Page 179 (Optional) Connect a phone to the other open phone port on the parallel splitter. Figure 12-13 Back view of the product 1 Telephone wall jack 2 Phone cord connected to the 2-EXT port 3 Parallel splitter 4 Telephone (optional) 5 Computer with modem 6 Phone cord supplied in the box with the product connected to the 1-LINE port Now you need to decide how you want the product to answer calls, automatically or manually:...
- Page 180 Chapter 12 To set up the product on a shared fax/voice line with a computer dial-up modem and answering machine Find the phone cord that connects from the back of your computer (your computer dial-up modem) to a telephone wall jack. Disconnect the cord from the telephone wall jack and plug it into the port labeled 2-EXT on the back of the product.